About Lesson
1. Making a spanner on TinkerCad
Now we are Designing a Spanner.
For Designing a Spanner, we divide it into Three Units.
1. The JAW
2. The HANDEL
3. The RING
After dividing the Spanner into Three Units, now design all units one-by-one and then add (Group) all units.
Design of the JAW of Spanner
To Design this Unit,
– First Drag & Drop a Cylinder or Polygon from the Basic Shapes to the work-plane.
– Now give Hight of the Cylinder Shape (10mm), Diameter (30mm).
– Now put the Polygon shape on the Cylinder shape According to the given Picture.
– Now click on Polygon shape and then click on Hole to Merge the Both shapes.
Note: – The Hight of Polygon should be more then Cylinder.
After merging Both shapes
– Now select all Shape, then click on Group Icon, for Grouping Both shapes.
Now JAW is designed, it will look like this.
Design of the Handle of Spanner
To design the handle of Spinner
– First Drag & Drop a BOX Shape from the Basic shapes to the Work-Plane.

– Now give Height, Width, & Length of the Box.
1. Height of the Box (10mm).
2. Width of the Box (15mm).
3. Length of the Box (100mm).
Now, Handle will look like this.
Design of the last unit of Spanner
To Design this Unit,
1. First Drag & Drop a Cylinder or Polygon from the Basic Shapes to the work-plane.
2. Now give Hight of the Cylinder Shape (10mm), Diameter (30mm).
3. Now give Hight of the Polygon Shape (10mm), Diameter (20mm).
Note: – The Diameter of Cylinder should be more then Polygon.
– Now increase the sides of Polygon.
– Now put Polygon shape on cylindrical shape according to this image,
– Then click on Align to centralize both shapes.
-
Note: – when the Middle Dot will become Grey in color, then the middle object is centralized.
After centralizing Both shapes.
– Now click on polygon shape, then click on HOLE to Merge the shape.
– After merging the polygon shape, Now select all shape, then click on Group Icon to
Group Both shapes.
The ring will look like this.
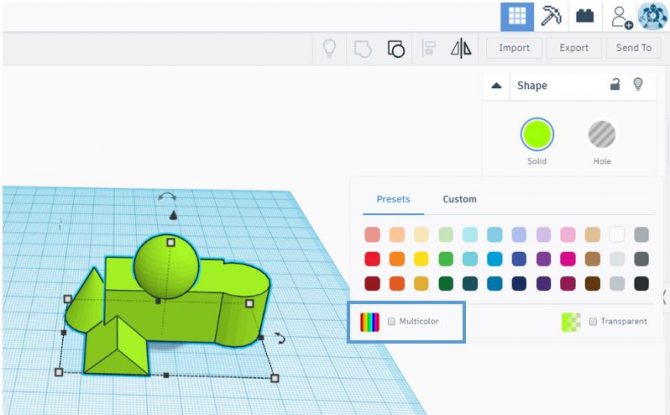
Change the Color of the Shape
To change the color of the shape.
1. Select any shape.
2. Then click on the solid icon.
3. Then choose any Color.
Adding Up all units of Spanner Together
– Place All Units according to this image.
Now the final step is to Grouping all Units.
1. After adding all units together, select all shapes.
2. Then click on Group Icon.
After Grouping all Units,
Our spanner is finally ready.

The 3D Model of the spanner is ready to become a 3D solid shape.
